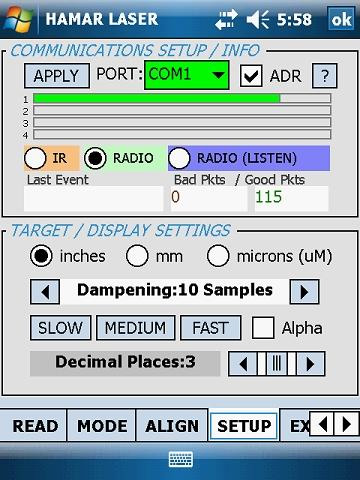
No communication from target(s)-receiving error “Error opening Com PortX”Perform a Clean Boot
Resolution: Perform Hard Reset (Factory Reset)
WARNING: All application software installed by the factory and the customer, plus licenses, settings and user data will be cleared if this function is performed!

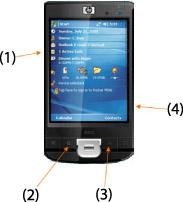
- Hold down the Power key and press the right soft key
 to display a countdown. Continue to hold down both keys until it counts down to zero, followed by a brief appearance of the boot screen. Continue to hold both keys down until a screen appears warning that if you continue, this operation will clear the persistent store. Follow the instructions on the screen ONLY if you want to completely clear your unit.
- Follow the on-screen prompts to setup your Nomad. i.e. Screen alignment, Date & Time, etc.
- Start ActiveSync (Windows XP) or Windows Mobile Device Center (Windows Vista/Windows 7,8,10) on your Desktop or Laptop.
- Connect Nomad PDA, via USB cable, to PC. If you have not already run the ActiveSync setup, make sure you uncheck ALL boxes except FILES. Follow on-screen prompts to finish setup.
- Copy & Paste all of the Read9ZB files from your PC to the Nomad.
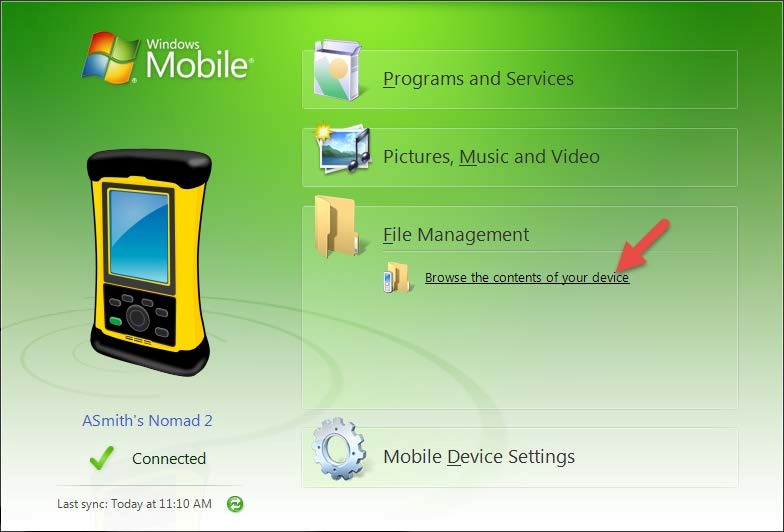
- In ActiveSync, Click on EXPLORE, MyWindows Mobile Based Device, open the Program Files folder and create a new folder called Read9ZB to Paste the files in.
- In Windows Mobile Device Center, click on File Management, Browse the Contents of Your Device, Double click on the \ drive, open the Program Folder and create a new folder called Read9ZB to Paste the files in.-
- Disconnect Nomad PDA from PC and ShutPDA off
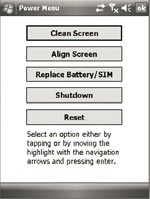
- Power menu: Hold down the Power key for about 3 seconds to display a countdown. (If you continue to press the Power key it will cause the PDA to reset/reboot when the countdown reaches zero.) Release the Power key while the countdown is proceeding, you will then access the following menu. Tap Shutdown.
- Remove the top boot of PDA
- Using the screwdriver on the stylus, unscrew the 2 screws, ¼ turn each, on the Top Boot. Lift the boot off the PDA.
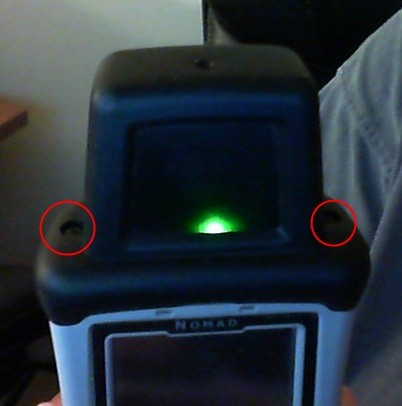
- Using the screwdriver on the stylus, unscrew the 2 screws, ¼ turn each, on the Top Boot. Lift the boot off the PDA.
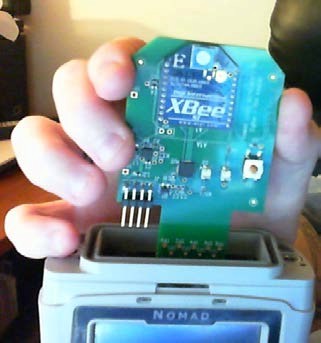
- Gently remove Zigbee Radio card by lifting upwards
- Re-Installing Driver and Files
- Press the Green power button to turn the PDA back on.
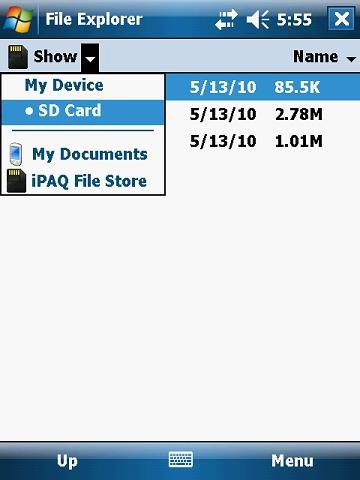
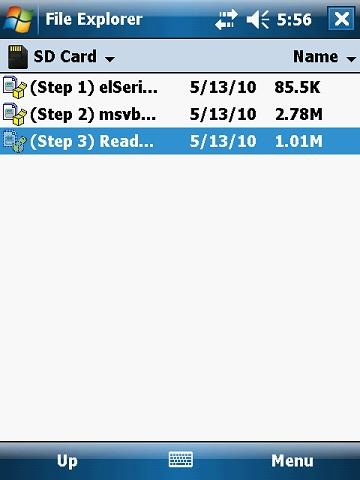
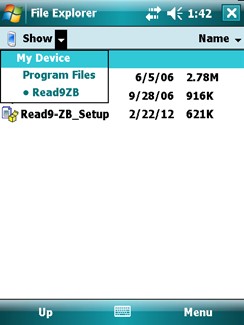
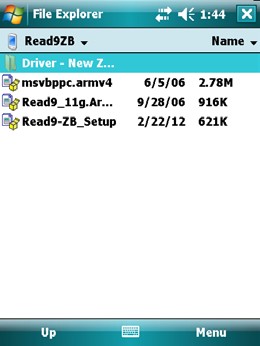
- Tap on the Start button and click on Programs, File Explorer and using the small drop-down arrow, located near the top left of the screen, select My Device. Then tap on Program Files>Read9ZB>Driver – New Zigbee Board to open the folder. Tap on the file located in the folder to install the driver. When setup is complete tap on the drop down arrow and select Read9ZB.
- Install the remaining 4 files: msvbppc.arm4, Read9_11g.Ar…, PdaWarning and Prog-ZB_Setup
- After each file is installed tap on the X in the top right corner to exit the setup screen.
- Shutdown the PDA and Reseat Zigbee Radio
- Press and hold the Green power button for 3 seconds and tap on Shutdown.
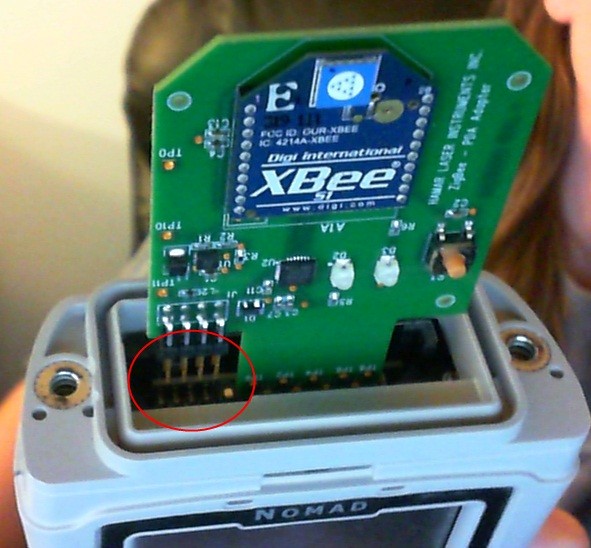
- Align the Zigbee radio card up to the small thin socket and align the gold prongs to their sockets. Push down gently, making sure not to bend the prongs. (as seen in image below)
- Replace Top Boot Cap and tighten screws, ¼ turn clockwise.
- Press green power button to turn PDA on, you will receive a pop-up. When the dialog pops up saying “Unidentified USB Device” enter CP210xVCP for the driver name. The dialog should close when OK is pressed.
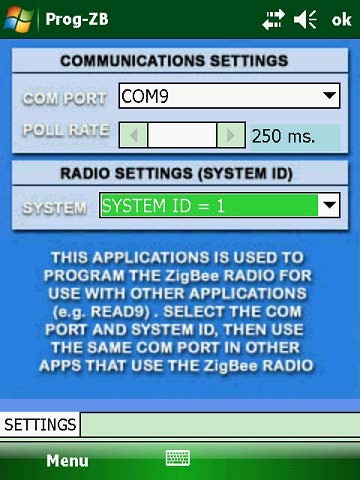 Tap Start, Programs, scroll down to Prog-ZB to start program. Once program is running, tap on the drop-down arrow and change COM Port to COM9 and SYSTEM to SYSTEM ID = 1. Close program by tapping on ok.
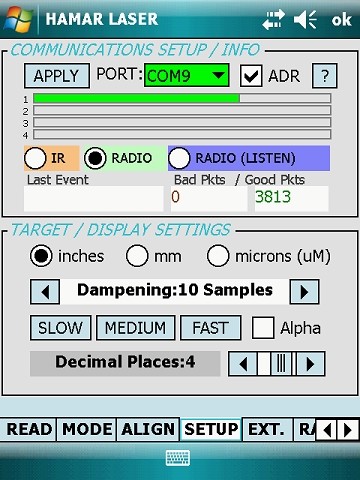
- Launch Read9 program, (if it is not listed in the Start menu, select Programs and scroll down to find Read9 icon and tap to launch) tap on the Setup tab and change PORT to COM9, check the radio circle next to Radio then tap on APPLY to finalize settings.. Tap on ok to exit Read9 and save all current settings, making sure to select YES to save your settings.
- You have finished reinstalling your Read9ZB software, turn on your Target and Laser to test your software.
