How Can We Help?
Changing POS Sensing on A-1519 Target
- Log in with a Power User or Administrator access level.
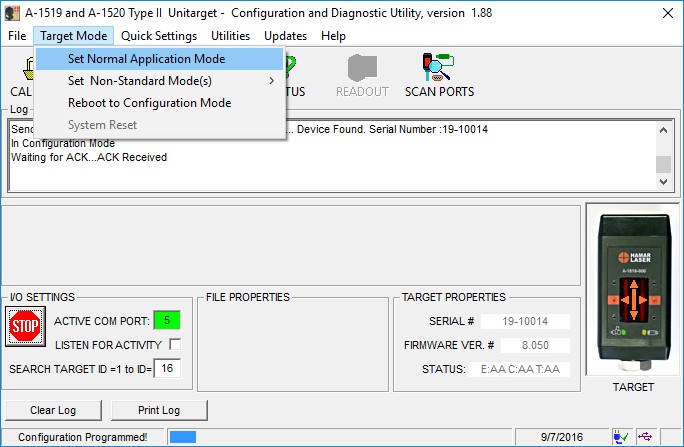
- If the target is in Application Mode, select Reboot to Configuration Mode.

- Wait for the utility to re-acquire the target.
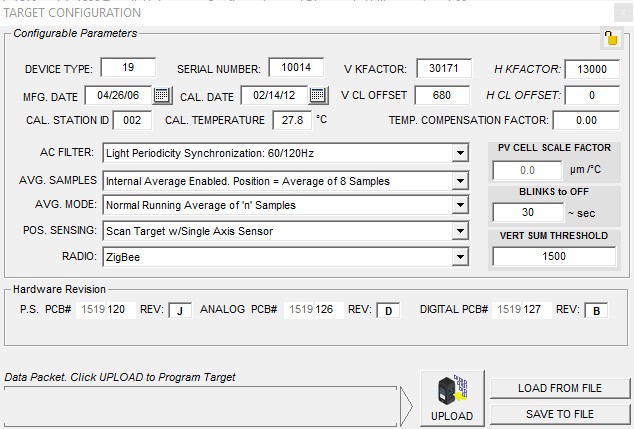
- Click the CONFIGURE menu button.


The Target Configuration Window displays (Figure 1). The following fields are disabled (reserved for Hamar Laser use only):- Device type
- Serial
- V KFactor
- H KFactor
- Mfg. Date
- Cal. Station ID
- Cal
- Temp Compensation Factor
- PV Cell Scale Factor
- All Hardware Revision
- Radio
- Change the POS SENSING, Configure the target using the utility, based on the laser type and Type II Unitarget as follows:
- Scanning, Single Axis Legacy Mode: Select this mode for Type II Legacy Targets only. Select for use with scanning lasers only.
- Scanning, Dual Axis Mode: Select this mode for Type II, current version. Select for use with scanning lasers only.
- Fixed Beam, Dual Axis: Select this mode for all continuous line lasers (for example the L-700 and L-705 in continuous mode).
- Pulsed Beam, Dual Axis: Select this mode for use with pulsed line lasers only (for example, the L-705 in pulsed beam mode).
- Once selected click the UPLOAD (Figure 1) button.
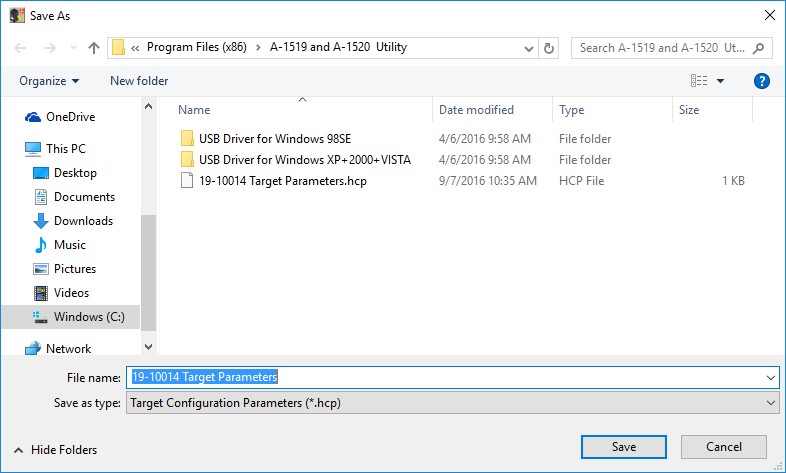
- You’ll be prompted to save Target Parameters. (Figure 2)

Figure 2- Save Target Parameters - After saving Target Parameters, click on Target Mode and select Set Normal Application Mode to set the target back to normal functioning mode.

- Click File > Exit to close the software and safely remove the target from the USB port.

